Chemical manufacturing is as old as civilization, and the discoveries of bronze and iron came to define the eras that ensued. In modern times, we take for granted a plentiful supply of metals, plastics, dyestuffs and medicines. We have come to depend on the chemical industry, including chemical engineers, to provide us with all the materials we need.
But the supply of these materials is not infinite. As the human population grows, and demands an ever-higher standard of living, the consumption of the Earth’s materials is in danger of getting out of control.
It is therefore essential that chemical engineers become responsible stewards of the raw materials that remain. We need to develop methods for chemical processing that are both chemically and environmentally efficient, and which move us towards a sustainable society. We need new materials that can provide what we need without destroying the Earth.
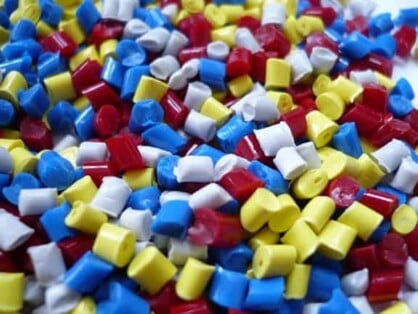
We currently use hundreds of different plastic materials (strictly, we should probably call them polymers). These materials are selected for their specific properties: stiffness, strength to weight ratio, the ability to stop the fizz escaping from our diet cola. If we want to replace our conventional plastics with biodegradable alternatives, then we must also find alternatives with similar properties.
A bioplastic is a type of plastic that can be made from plant starches or gelatins/agars. They are better for the environment because they are not derived from petroleum. They can also be easily made at home with a few simple ingredients and a stove!
Here’s how to make your own bioplastic at home:
Materials and Equipment
- 10ml distilled water
- 0.5-1.5g glycerol
- 1.5g cornstarch
- 1ml of white vinegar
- 1-2 drops food coloring
- Adult supervision is recommended.
How to Make Bioplastic
To make this type of bioplastic, you will need cornstarch, distilled water, glycerol, white vinegar, a stove, a saucepan, a silicone spatula, and food coloring (if desired). These items should be readily available at the grocery store or online. Glycerol is also called glycerin, so try searching for that if you’re having trouble finding glycerol.
Combine all of the ingredients and stir together. Add all of the ingredients to the saucepan and stir to combine with the spatula. Stir until you get rid of most of the lumps in the mixture. At this stage, the mixture will be a milky white color and quite watery.
Place the saucepan on the stove and turn on the heat to medium-low. Stir continuously as the mixture heats. Bring it to a gentle boil. As the mixture heats, it will become more translucent and begin to thicken.
Remove the mixture from the heat when it becomes clear and thick. Total heating time will be around 10-15 minutes. Lumps may begin to form if the mixture gets overheated.

Add one-two drops of food coloring at this stage, if you would like to color the plastic.
Pour the mixture onto foil or parchment paper. Spread the heated mixture onto a piece of foil or parchment paper to let it cool. If you would like to mold the plastic into a shape, it must be done while it is still warm. See below for details on molding the plastic.
Remove any bubbles that you see by poking them with a toothpick.
Allow the bioplastic to dry for at least two days. Leave the plastic in a cool, dry place for this process.
It will take time for the plastic to dry and harden. As it cools, it will begin to dry out. Depending on the thickness of the plastic, it can take longer for it to dry. If you make one small thick piece, it will take longer to dry than a thinner larger piece.
Check the plastic after two days to see if it has fully hardened.
Molding the Bioplastic
A mold is the negative of a shape that you would like to make. You can make a cast of an object you would like to reproduce by sculpting two pieces of clay around the object. When the clay dries, remove the two pieces. If you fill each half with the liquid plastic and then put the halves together, you can make a copy of that object. You can also use a cookie cutter to cut shapes out of the plastic while it is still warm.
An alternative to making your own mold is to purchase a mold at a craft or hobby shop.
Pour the hot plastic into the mold. Once you have a mold, you can use it to make more objects. While the plastic is still hot, pour it into the mold. Make sure that the plastic gets into the entire mold and try pop bubbles by lightly tapping the mold on the counter.
To make the object easier to remove when it dries, coat the mold with a non-stick spray before pouring the plastic in. Let the plastic dry for at least two days. The plastic will take a few days to dry and fully harden.
After two days, check the plastic. If it still appears to be wet, let it sit for another day and check it again. Continue to do this until the plastic is fully dry.
Remove your plastic from the mold. You have now made your own bioplastic version of whatever object you chose to mold.
Heather Sheridan P.E., PMP is a Civil Engineer and Project Manager at Black & Veatch in the Hydropower Department. Heather has a BS in Civil Engineering from the University of California, Davis with a focus on hydraulic structures and environmental design.
Author
-

SWE Blog provides up-to-date information and news about the Society and how our members are making a difference every day. You’ll find stories about SWE members, engineering, technology, and other STEM-related topics.


