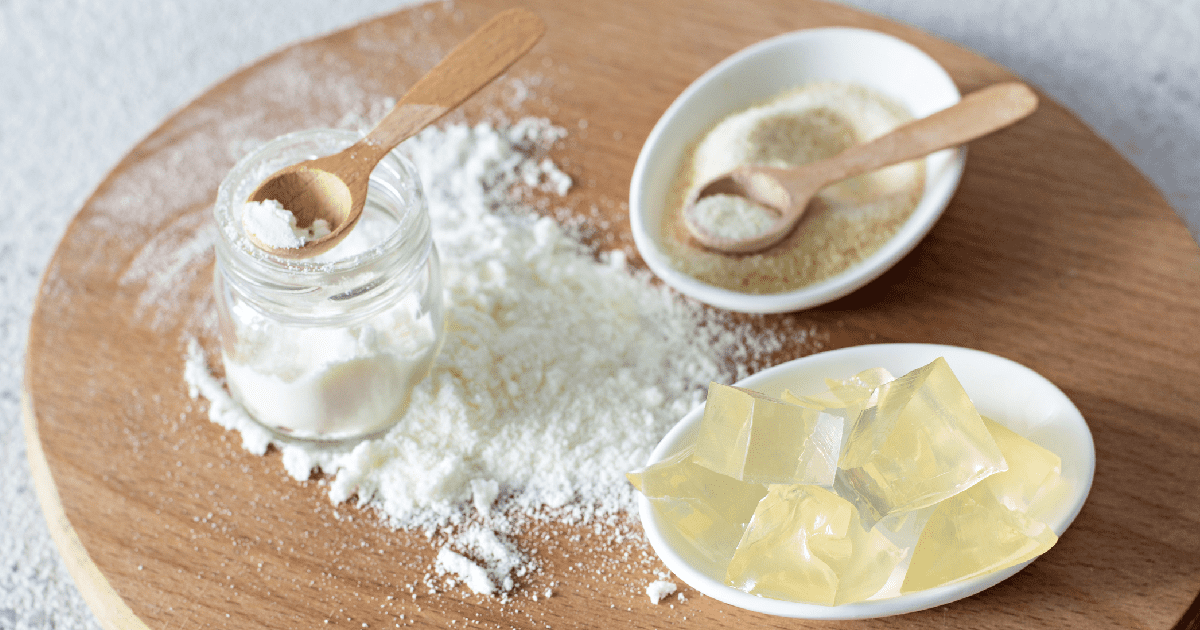
Of all the foods we eat, gelatin seems to have magical powers, suspending fruits; molding into towering, translucent sculptures; transforming from a solid into a liquid as soon as a spoonful hits the warmth of our mouths. It’s not magic, but special gelatin molecules that are responsible for these food tricks.
The strength or firmness of a gelatin gel depends upon several factors:
- The concentration and quality of the gelatin
- The absence or presence of additives, such as salt, sugar, milk, alcohol or acids
- How the gel is cooled – slowly at room temperature, or in a refrigerator
You will investigate how common additives influence gel strength. Do acids, like lemon juice, turn your gel into a quivering, fragile blob? Does sugar stiffen your gel and make it as tough and rubbery as a bouncy ball? It’s time to find out!
Materials and Equipment
- Popsicle® molds with lid (12); the lid should be separate from the stick portion, and the molds should be equally sized. Something like this, as long as you have twelves ‘test’ cells.
- Masking tape (1 roll)
- Small funnel
- Spoon, used for stirring
- Popsicle sticks; Note: Only 1 is needed, but get at least 10 to account for breakage during the formation of the test instrument.
- Small paper cups; Note: Only 2 are needed, but get at least 10 to account for errors in forming the test instrument.
- Test additives, choose 3 of the following (you will need 8 tbsp. of each one you select).
- Citric acid, also known as “sour salt;” available at some grocery stores and online
- Table Salt
- Powdered Milk
- Sugar
- Tablespoon
- Gelatin, plain, unflavored; available at grocery stores (1 box)
- Saucepan, medium-sized, about a 6-cup capacity
- Measuring cup, 2-cup
- Paring knife
- Scissors
- Sandpaper (1 square), or nail file
- Quarters (20)
- Liquid measuring cup, 1-quart size, microwave-safe
- Data Table Worksheet
Preparing Your Popsicle Molds
- Place a small piece of masking tape on each of 12 Popsicle molds. Be sure to put the labels on the molds and not on the lid, in case the lid gets disoriented and placed the wrong way on the molds.
- On three of the pieces of masking tape, write down Control with a pen or pencil. These will be the molds that have only gelatin, and nothing else added.
- Select three additives that you want to test to see how they influence gel strength. Use the knowledge you have to make an educated guess or hypothesis on the outcome of your test.
- Write down the name of each of the additives three times on three different pieces of masking tape and attach them to the molds. Now you should have 12 molds labeled as follows: 3 as Control, and the other 9 labeled with a test additive.
- Add the appropriate test additives to each of the molds – remember to pick 3:
- For the molds labeled Control, add nothing to the mold.
- For the molds labeled Acid, add 2 tbsp. citric acid to each mold.
- For the molds labeled Sugar, add 2 tbsp. of sugar to each mold.
- For the molds labeled Salt, add 2 tbsp. of salt to each mold.
- For the molds labeled Milk, add 2 tbsp. of powdered milk to each mold.
Preparing Your Gelatin
- Pour 2 cups of cold water into a sauce pan.
- Add two packages of plain, unflavored gelatin. Each package should weigh 7.2 gm. Stir the water and gelatin with a fork or spoon for a few seconds, and then allow it to sit. This is called “softening the gelatin.” Do not add heat to the pan.
- Add 2 cups of water to a microwave-safe, liquid measuring cup and place it in the microwave. Microwave the water on high until it comes to boil.
- Carefully remove the boiling water from the microwave and pour it into the sauce pan. Use caution to avoid burns.
- Stir the contents of the sauce pan with a spoon until the gelatin dissolves, about 1 min.
Filling Your Molds
- Bring your sauce pan close to the Popsicle molds.
- Using a 1/3-cup measuring cup, scoop up 1/3 cup of the gelatin and pour it into one of the molds. A funnel will help avoid spills.
- Use a clean spoon to stir the solution in the mold, scraping the bottom 3 times.
- Repeat step 2 and 3 until all the molds are filled.
- Do not add any Popsicle sticks or other sticks to the molds. Cover the molds with the mold’s lid and place the molds in the refrigerator for at least 24 hours. Do not disturb them as they cool.
- Note: Not all off the additive dissolves in the gelatin. This is intentional. It ensures you compare saturated solutions, or solutions that have the maximum amount of additive dissolved in it.
Making Your Test Instrument
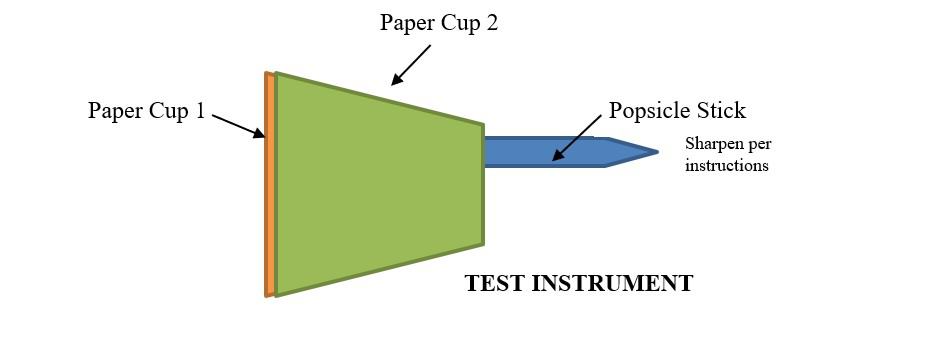
- Using scissors, trim off some of the wood on one end of a Popsicle stick so that it becomes more pointed. This may take a few tries to get it right, so don’t get frustrated if it breaks and you need to try again with a fresh Popsicle stick! Ask an adult for help you if you need it. If there are any rough edges after you have made your point on the Popsicle stick, use a piece of sandpaper or a nail file to smooth them out.
- Stack two small paper cups, one on top of the other.
- Push the tip of a small paring knife through both cups to create a small slit about 1/4 inch long. Use caution when handling the knife and ask for an adult’s help, if necessary.
- Insert the rounded end of the Popsicle stick into the slits in the cup, so that it is sticking up through the inside of the cups about 1/2 an inch. If the stick doesn’t feel tight or secure inside the cups, then you can use a piece of masking tape to secure it or try again with another pair of cups and make a smaller slit. If you do use masking tape, make sure the bottom of the paper cups remains flat.

Testing Your Molds
- Remove your molds from the refrigerator after they have chilled for at least 24 hours.
- Remove the lid and inspect the molds. Touch the surface of the molds gently with your finger and write down how each one feels in your lab notebook. Are they springy? Soft? Mushy? Rubbery? Firm? Put your observations in the data table.
- Put the lid back on top of your molds.
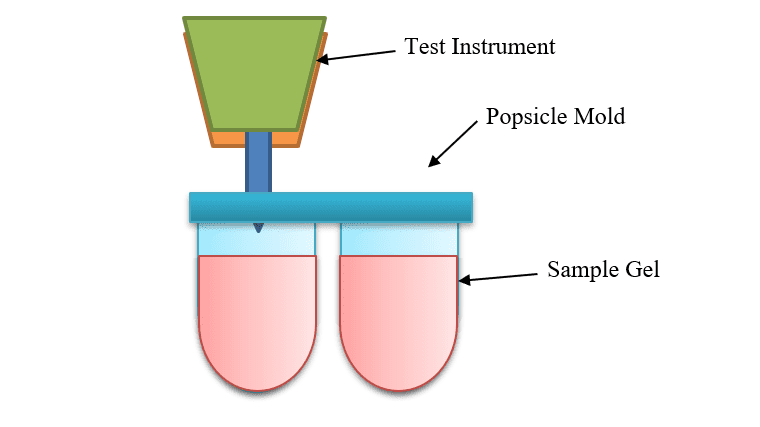
- Insert the sharpened point of your test instrument through one of the slits cut in the lid, so that the sharpened point is resting on the surface of one of your molds. Do not push the Popsicle stick into the gelatin.

- Add a quarter to the cup on top of the Popsicle stick. Watch the test instrument to see if it starts to move down
- If the test instrument does not move down, then add another quarter. Continue adding quarters until the test instrument starts to move down.
- If the test instrument starts to move down, then do not add any more quarters, unless the test instrument stops moving again, or the bottom of the cups is not yet resting on the lid.
- Once the bottom of the cups is resting on the lid of the molds, as shown in Figure 3, count the number of the quarters inside the cup and record it in a data table, like the one below.
- Repeat steps 4–6 for all your molds so that you have a total of three trials for each type of additive.
Analyzing Your Data Chart
- For each test additive, average the number of quarters that was required to cut through the Popsicle mold on your data table.
- Create a bar chart showing the additive to the gelatin on the x-axis, and the average number of quarters that was required on the y-axis. Which additive created the strongest gelatin? Which additive created the weakest gelatin?
Variations
- Compare the gel strength of equal Popsicle molds that are allowed to gel at room temperature, with those that are allowed to gel in the refrigerator. Take measurements at different times: 1, 2, 4, 8, 12, 24, and 48 hours.
- Compare the gel strength of different concentrations of gelatin. Bu adding more or less water when mixing the gelatin.
Author
-

SWE Blog provides up-to-date information and news about the Society and how our members are making a difference every day. You’ll find stories about SWE members, engineering, technology, and other STEM-related topics.


